How to set up a wifi range extender?
Sunday, Dec 08, 2024 · 4 minutes

Having trouble with weak WiFi signals in certain areas of your home? A WiFi range extender is the best way to increase wifi range for your home. Learn how to connect wifi range extender in your home to improve your WiFi signal strength and eliminate dead zones. Follow our step-by-step guide for easy installation. Whether you're a tech-savvy individual or a complete beginner when it comes to setting up networking devices, installing and configuring a WiFi for long range is a straightforward process that anyone can do. So why put up with weak WiFi signals in certain areas of your home when you can easily enhance your WiFi coverage with a simple device like a range extender? Say goodbye to dead zones and hello to reliable WiFi connectivity throughout your entire home!
In this comprehensive guide, we will walk you through the best way to increase wifi range by installing and setting up a WiFi range extender in your home. From positioning the extender to configuring it with your existing network, we've got you covered.
Before we dive into the setup process, let's first understand what a WiFi range extender actually is. A WiFi range extender, also known as a wireless repeater or booster, is a device that picks up the existing WiFi signal from your router and rebroadcasts it to extend the coverage area. This can help eliminate dead zones and improve connectivity in areas where the WiFi signal is weak.
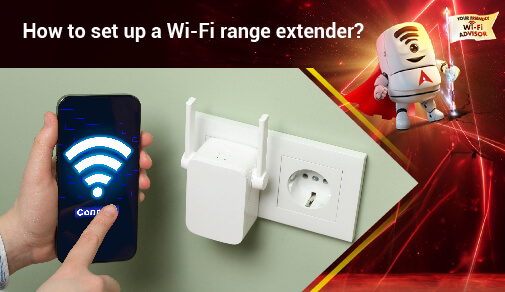
1. Choose the Right Location: The first step in setting up a Wi-Fi range extender is to choose the right location for the device. Place the extender halfway between your router and the area where you need better Wi-Fi coverage. Avoid placing it in areas with thick walls or large appliances that can interfere with the signal.
2. Plug In the Extender: Once you have chosen the optimal location, plug in the Wi-Fi range extender into a power outlet. Make sure the extender is within range of your existing Wi-Fi network.
3. Connect to the Extender: Use your computer or mobile device to connect to the Wi-Fi network provided by the extender. This network will typically have a different name than your main Wi-Fi network.
4. Access the Admin Panel: Open a web browser and enter the IP address of the extender in the address bar. You will need to log in using the default username and password provided in the user manual.
5. Configure the Extender Settings: Once you have accessed the admin panel, you can configure the settings of the Wi-Fi range extender. You may need to change the network name, security settings, and password to match your main Wi-Fi network.
6. Test the Connection: After you have configured the extender settings, test the connection to ensure that the Wi-Fi range extender is working properly. Check the signal strength in the areas where you previously had poor Wi-Fi coverage.
7. Enjoy Better Wi-Fi Coverage: Congratulations! You have successfully installed and set up a Wi-Fi range extender at home. Now you can enjoy better Wi-Fi coverage and faster internet speeds in every corner of your house.
Top WiFi Range Extenders for Home in India, Here are some of the best Wi-Fi range extenders available in India that offer excellent performance and value for money:
The TP-Link RE305 is a top choice for users looking to extend the range of their Wi-Fi network. With a coverage area of up to 1500 square feet and a speed of 1200 Mbps, this range extender is perfect for streaming HD videos, online gaming, and other bandwidth-intensive tasks. It also features an easy-to-use setup process and works with any standard router to provide seamless connectivity throughout your home.
The D-Link DAP-1620 is another reliable option for extending the range of your Wi-Fi network. With a coverage area of 1200 square feet and a speed of 1200 Mbps, this range extender is ideal for households with multiple devices and heavy internet usage. It also comes with handy features like dual-band technology and smart signal indicators to ensure optimal performance at all times.
The Netgear EX6110 is a popular choice for users who want to boost their Wi-Fi signal in larger homes. With a coverage area of up to 2000 square feet and a speed of 1200 Mbps, this range extender is perfect for households with multiple floors or outdoor spaces. It also features a fastlane technology that allows you to dedicate one band for maximum speed, making it ideal for streaming and gaming without interference.
In conclusion, setting up a WiFi range extender is a simple and effective way to extend the coverage of your WiFi network and eliminate dead zones in your home. By following the steps outlined in this guide, you can easily improve your WiFi connectivity and enjoy a seamless online experience throughout your entire home.

Lead has been submitted successfully.
![]() Please wait while we redirect you
Please wait while we redirect you
![]() One of our representatives will reach out to you shortly
One of our representatives will reach out to you shortly
One of our representatives will reach out to your shortly
![]() Please wait while we redirect you
Please wait while we redirect you

Please enter your registered phone number to proceed
Please enter correct OTP to proceed

Dear customer you are successfully subscribed
Please wait while we redirect you
Your ACT Shield subscription has been successfully deactivated
Dear user, Your account doesn't have an active subscription
Dear customer Entertainment pack is already activated.
Please wait while we redirect you


