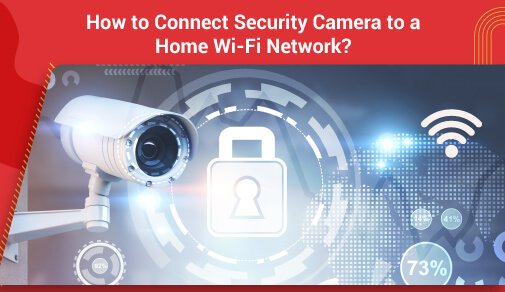
How to Connect a Wireless Security Camera to a Home Wi-Fi Network?
Saturday, Jun 08, 2024 · 4 minutes

Home security systems have become a vital part of the house as technology blends seamlessly into our daily lives. Amongst all security cameras, wireless ones are highly regarded for their ease of installation and flexibility. This ensures that one can do surveillance and receive alerts on any intrusion, even if far from home, by connecting the best wifi network to a wireless camera to your Wi-Fi network protecting your residence. Within this guide, we provide step-by-step instructions on how to connect security camera to Wi-Fi, different wifi connection options available, and the advantages of having Wi-Fi-enabled surveillance cameras.
There are various methods of how to connect security camera to Wi-Fi, and each of them has its benefits.
1. Direct Wireless Connection: Simply add your wireless security camera to your home's existing Wi-Fi network, which is suitable for homes where they can easily make use of Wi-Fi signals.
2. Wi-Fi Extenders: Using a wi-fi extender helps when you prefer setting up a camera in an area with no signal. These devices amplify weak signals from the best wifi network, thus ensuring that areas with very poor ones also get connected.
3. Mesh Wi-Fi Systems: A mesh system is where multiple devices (nodes) work together to create an uninterrupted, strong wireless network throughout the whole household. It could be great for large homes or those with several dead zones that one router may not cover.
4. Powerline Network Adapters: Extenders use electrical wires in your home, hence expanding their range. To make this possible, insert one powerline adapter close to the router. At the same time, another should be positioned near the computer's security camera, which is located far away from direct reach of Wi-Fi waves.
1. Choose the Right Place: The first step towards wireless security camera setup is to choose the location of your camera. Make sure that it is within reach of Wi-Fi and has a clear view of what is being monitored. You should also avoid placing it in areas with strong electromagnetic interference or too far away from the wireless router.
2. Power the Camera: The camera you use for this purpose should be powered directly. In cases where wireless cameras are battery operated, ensure that they have full charge.
3. Install the App: Most modern wireless security cameras come with a complementary app that you will need to install on either your smartphone or tablet. With this application, you can set up and manage your camera remotely.
4. Create an Account: If needed, create an account within the app. Typically, users will be required to enter their email addresses and establish passwords before using some apps.
5. Add Your Camera: Finally, just follow the instructions provided in the app for adding your camera. Normally, this will involve scanning a bar code on its body or keying in any other unique code assigned to it.
6. Connect to Wi-Fi: During this procedure, the app will require you to connect CCTV to Wi-Fi. You can choose from a list of networks available and enter your Wi-Fi password. You must, therefore, ensure that your Wi-Fi supports the camera's frequency.
7. Test the Connection: Now, check whether the camera works fine after being connected. Test whether it streams the video and if you can control it via the app. Check for a live feed from the camera, motion detection notifications, and other things.
There are various benefits of IP camera linked via wi-fi, which in turn improve home safety as well as convenience:
1. Remote Monitoring: The very first benefits of IP camera among all is to being able to monitor one's property remotely is among its greatest merits. With this setup, everyone can see what their camera captures through their smartphone or computer, even when they are busy at work or on vacation.
2. Motion Detection and Alerts: Usually, these cameras have built-in motion detectors that send signals to other gadgets whenever movement occurs nearby, allowing them to protect people against possible intrusion on time.
3. Cloud Storage: Most WiFi Cameras come with cloud storage options where their footage is saved far away from the premises at all times. This also comes in handy, especially during burglary cases whereby a thief may want to turn off such cameras.
4. Two-Way Audio: Some more advanced models allow someone to communicate with visitors and scare away burglars by speaking straight into their eyes with such tools.
5. Integration with Smart Home Systems: Many Wi-Fi cameras can be integrated with different smart home devices, hence becoming part of a larger security set-up within a household environment. For example, one may link up their camera with smart lights or smart locks to increase home security levels.
Connecting a wireless security camera to your Wi-Fi network at home is a simple process that comes with numerous advantages. From being easily fitted to the possibility of being monitored remotely, Wi-Fi cameras are indispensable for modern security purposes in residential areas. By understanding the different Wi-Fi connectivity options, such as ACT's best WiFi network, and following some steps on how best to connect your camera, you can improve safety within your house and live with no worries that someone might interfere with your property at any time.

Lead has been submitted successfully.
![]() Please wait while we redirect you
Please wait while we redirect you
![]() One of our representatives will reach out to you shortly
One of our representatives will reach out to you shortly
One of our representatives will reach out to your shortly
![]() Please wait while we redirect you
Please wait while we redirect you

Please enter your registered phone number to proceed
Please enter correct OTP to proceed

Dear customer you are successfully subscribed
Please wait while we redirect you
Your ACT Shield subscription has been successfully deactivated
Dear user, Your account doesn't have an active subscription
Dear customer Entertainment pack is already activated.
Please wait while we redirect you


